

")

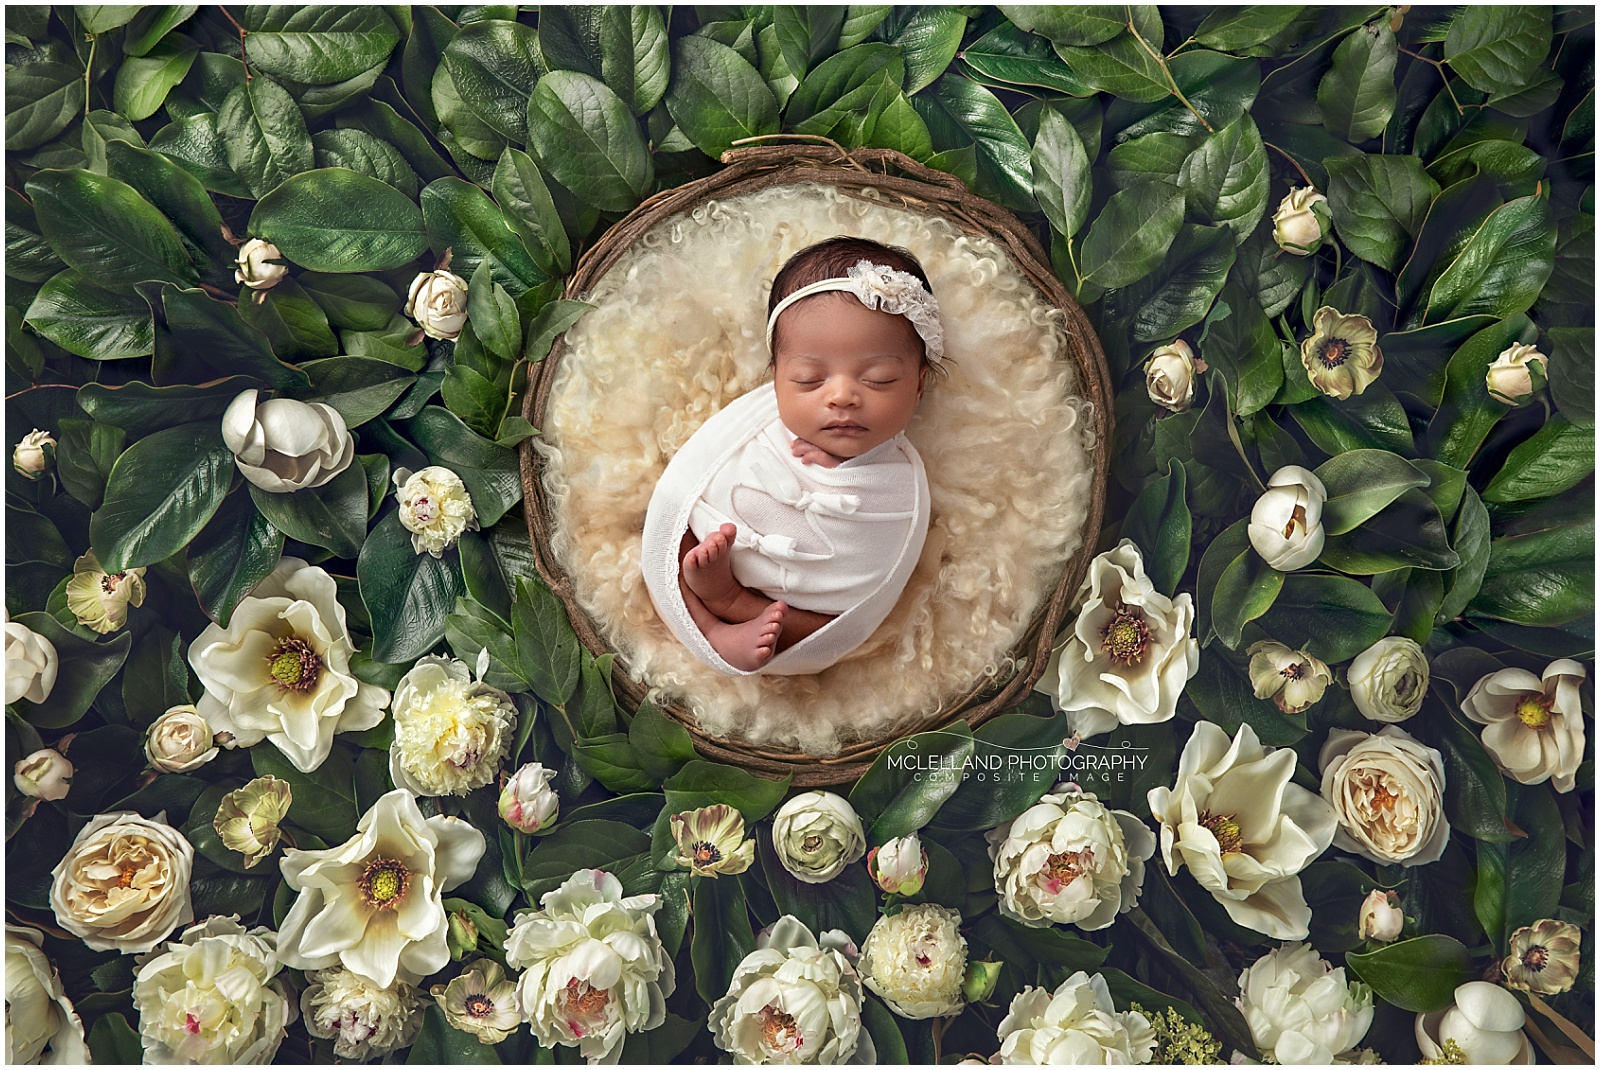
I love creating newborn composites. It is so exciting to photograph a newborn and create a beautiful piece of art for our clients. Seeing their sweet little baby photographed and merged into an artistic masterpiece is one of the reasons I love doing what I do.
As a refresher, a composite is a carefully edited image that is the result of multiple images being merged together. Check out my blog HERE for more information on this process.
Our clients receive one composite image with every newborn session we do. We have a catalogue of composite or digital images for them to choose from. I love seeing what image/s they will choose prior to their session with us. And we do require them to choose ahead of time as it allows us to prepare what items we need in the studio to create this beautiful image for them.
The most crucial factor in creating a composite image is to ensure that the baby has the exact same lighting on them as displayed in the digital image. Plus, the right camera settings are key to creating a sharp image of the newborn. And lastly, it is important to ensure that the baby is posed on the exact same or similar surface as the composite image. Let’s take a closer look at all these key points.
Duplicate the Lighting
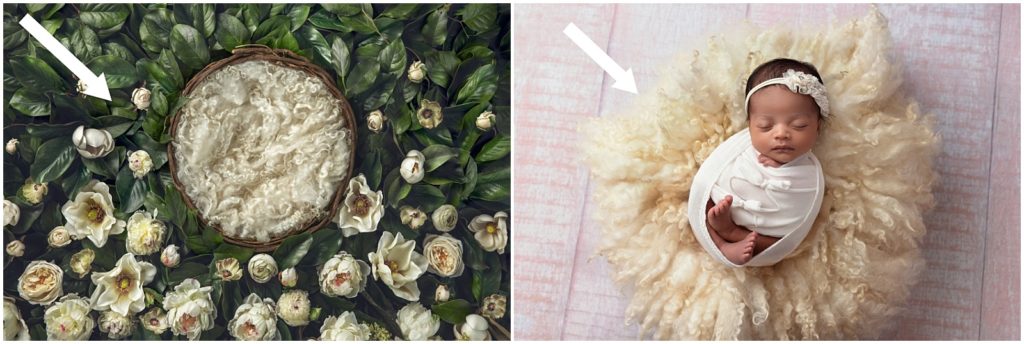
When I look at an image, I always check to see where the light is coming from. I look for the shadows which gives me the biggest clue about the direction of light. And if I have a tough time trying to figure this out, I will use Photoshop and darken the image even more to see where the shadows fall. In the case of the image below, the light is coming from the top left-hand corner at a 45° angle. So, when I pose baby on their back in this case for this image, I will make sure the light I create in the studio mimics this lighting exactly.
Camera Settings are Key
A good composite is an image that is sharp. When I look for vendors that create these images or create them myself in the studio, I always ensure the original composite is a sharp image that I can merge one of my baby photos into. If you are a photographer, then you know all about aperture and what that means to us. When I photograph a newborn, I use a narrower aperture and a very particular f-stop setting that photographs the baby so that they are sharp with no blurred edges. If the edges are blurred, then when the composite is fully created, it may not look realistic or pleasing to the eye of the viewer.
Re-Create the Same Surface Material
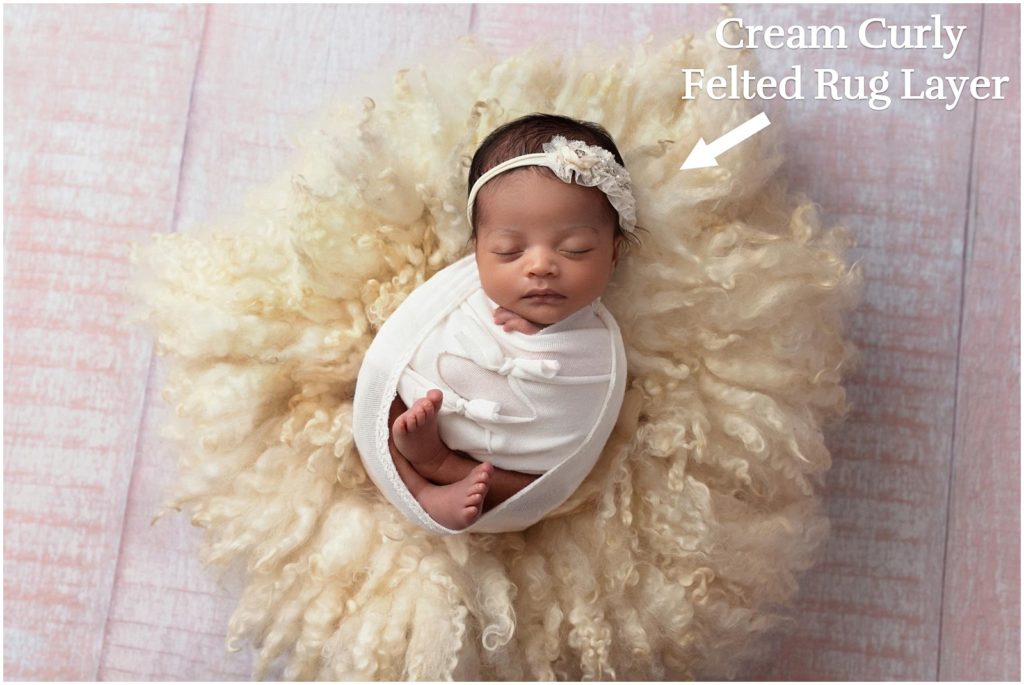
Surface material is what the baby is photographed on. I always look at the original image of the composite and find a similar surface material in the studio to pose the baby on. Sometimes the surface material can be blankets, wool, felt, or fluff. In the case of the image below, the baby needs to be photographed on a curly felted rug layer in a cream colour. The materials may also be close but not exactly the same in colour. I may also use Photoshop to change the colour of the material slightly so that the merging process is seamless. Therefore, it is important for our clients to choose their composite image before they enter our studio to ensure we have all the right materials on hand.
Let the Editing Process Begin!
When I work on these images, I always make sure I am in a dark room while I sit in front of my computer screen.
Once I have the image of the baby, I take the time to do what we newborn photographers do and clean up the skin (remove acne, blotches, scratches etc.) and any other details that may not be so pleasing to the eye.
I then make sure the lighting of the baby photo matches the composite image and adjust any exposure in post, as necessary. While I am doing this, I check to make sure the white balance of my photo also matches that of the composite image too and adjust accordingly.
Photoshop is my tool of preference when I design these images. I love seeing the end result and what I can create from start to finish.
The image shown in the video below has been sped up considerably and the baby has already been fully edited before being merged into this image. But the editing process from exposure/white balance adjustment, to fixing up the skin on the baby, to the final merge of the baby into the composite image, can take anywhere from 5 to 30 minutes depending on the level of difficulty of the composite image chosen.
I hope with this post you have gained a better insight into how we create these images that our clients only dream of. We do what we love, and love what we do.
McLelland Photography is certified in newborn photography and newborn safety by the (APNPI) Accredited Professional Newborn Photographers International.

")

share
share
share
share
share